


Here you can find the detailed instruction on how to convert data from several datasets in your database to one Microsoft Excel file (.xlsx) in Exportizer software.
Below, we explain how to export data from several SQL query results. But is also possible to export data from several tables or from a mix of SQL queries and tables.
Data from each source dataset will be placed to a separate sheet of the target XLSX file.
Note: Exporting multiple datasets at a time is possible in Exportizer Enterprise only.
Export Steps (GUI)
- Connect your source database.
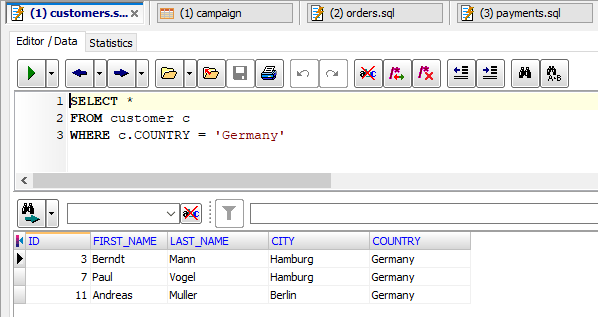
- Click New SQL Window button
 , then write and execute your SQL query. Create several other SQL windows, fill them with needed SQL text, and execute each of the queries:
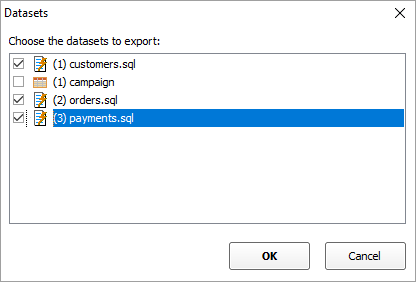
- Choose Export | Export Open Datasets... menu. All open datasets will be shown. Choose the datasets you wish to export data from and click OK:
- In Export wizard, switch to Excel (XLSX) tab. By default, Exportizer suggests to specify a folder where to store target files, each dataset per file. But as we want to export data to one target file, let's choose File in Folder / File selector (in the upper left corner) and specify the target file:
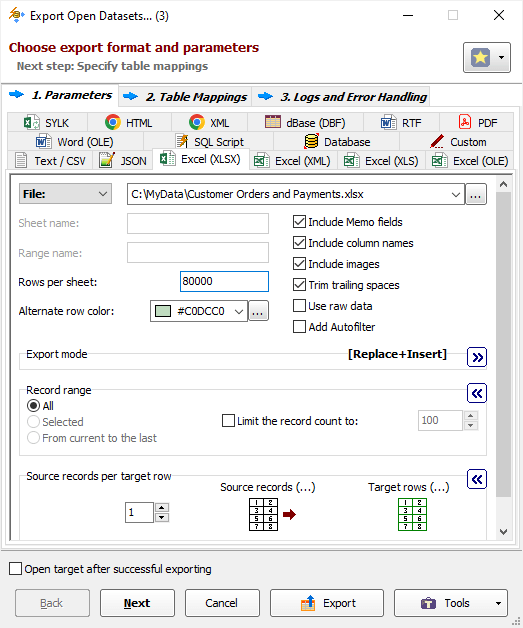
- Specify needed export parameters and click Next.
- Specify the source-to-target table mappings. In this context, it is the correspondence between the source datasets and target Excel sheets. By default, Exportizer names the sheets by your source SQL file names (if any) or tries to extract the name of any table from your SQL code; but you can change those names here to whatever you want. You can also reorder the datasets using the corresponding buttons; the sheets inside the file will be created in the order specified here.
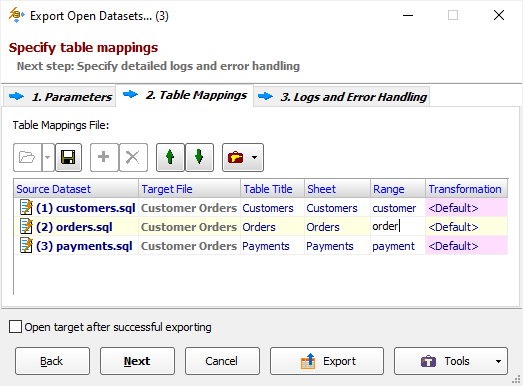
Note: If you later need to open the target Excel file in Exportizer, make sure to specify the range name for each target table (Range table mappings column); named ranges help Excel ODBC driver to correctly identify tables when opening an Excel file as a database.
If you need to change the column titles in the target tables, you can also specify nested field mappings for each dataset-sheet pair. Just click the '...' button in the Transformation table mappings column.
You can skip this step by clicking Export instead of clicking Next. In this case, the table and field mappings will be built automatically, which may be not desirable.
- Click Next to proceed to export logs and error handling options or click Export to start the export process immediately.
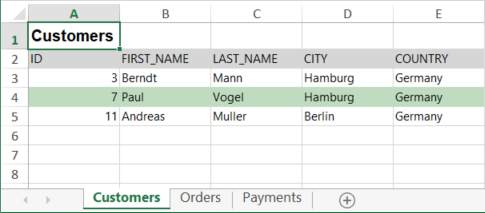
- Check the result in Excel:
See also